UPPER HULL DETAIL

Upper hull detail is well underway, and a recently bought Proxxon disc sander is proving very useful for shaping the walnut strip-wood, and planking. I’ve decided to deviate from the Caldercraft kit: I’m leaving out some of the smaller gun ports, which to me look as if they might have been added as an afterthought. I understand this was the case with the original ship. I’m also not adding the overlapping planking to the bow and stern upper hull, which I think will be difficult and time consuming to make look tidy, and will cover walnut planking which looks good as it is. So my model will not be quite so authentic as it should, but close enough for me.

MAIN GUN PORTS COMPLETE

I’ve never cut gun ports before. I decided to finish each with a 1mm x 4mm frame (not as in kit instructions). I marked the exact size of each gun port on self-adhesive paper, then placed on the hull. I made a cut with a craft knife around the line of each gun port to prevent the wood tearing when filing out. I used small diamond files to file out the ports. Fitting the frames was fiddly, and I lost a few frame parts inside the hull. A lot of file dust ends up inside the hull, so I’ve invested in a miniature vacuum cleaner attachment kit to help extract dust from the gun ports. These fit a standard vacuum cleaner, and it works well. This all takes time, and each gun port has probably taken me an hour to complete, but I’m happy with the results so far.

LOWER HULL SANDED AND DETAIL ADDED

Sanding took a long time. The kit supplied walnut planking varied in thickness, and to rub down all to the same finish would have taken ages, so I’ve not attempted it. I actually like the look of it as it is now, with varying finishes. 

Fitting the walnut rubrails to the bottom of the hull, and getting them to look right, was time consuming. After fitting the first, I made a paper template to help with the spacing of the rest. I used superglue, so there isn’t much time to make fine adjustments to the position on the hull. Initially I used a pencil line drawn on the hull to follow, but I then had remove one and re-sand as it didn’t look right. I finished up gluing temporary wood guides to the hull to make positioning of each rubrail easier, then cutting and sanding away the guides after the rubrail had been glued in place. A bit time consuming, but it worked, and I’m happy with the result.

I’m turning the boat up the right way to continue.

LOWER HULL PLANKING COMPLETE

Looks good to me. I took my time over this, and had to remove a few planks I wasn’t happy with, then replace with new planks. I fixed most of the walnut planks in place with superglue, and had to be careful not to glue my fingers to the hull. Now to tidy up the overhanging planks at the stern, sand down and turn the ship the right way up to continue.

DSC_1632

DSC_1630

WALNUT PLANKING PROGRESSING

Taking my time with this. I’m continuing with the system of measuring down five plank widths from the last walnut plank fitted, at mid ships, then fitting a temporary lime plank, allowing it to follow its natural path over the curves of the hull. I draw a line along the lime plank, then remove it. I then plank up to that line, tapering planking proportionally, towards the stern and bow. 

I’m happy with the plank bending tool. I’ve learned to give it a good 20 minutes to heat up before use.

DSC_1301

DSC_1305

DSC_1302

DSC_1303

DSC_1299

WALNUT PLANKING HAS BEGUN

Waiting for glue to dry is an opportunity to get on with another part of the project, so I decided to start putting the canons together, beginning with the main deck iron canons. I substituted cocktail sticks for the wheel axles, and the rear foot of each canon. I had to enlarge all the holes to 2mm, and I drilled these while the components were still in their component sheets, as they are easier to hold firm and less likely to split. It’s very useful to refer to the numerous photographs of the real Mary Rose online as a reference. Caldercraft have replicated them as they see fit for a kit, but you can do it your own way, and I like the white axles made from cocktail sticks. To finish the wheels to a nice round shape, I used my small pillar drill. 

I’ve started on the second layer of walnut planking. First I planked part of the stern. I fixed the first plank at deck level, then temporarily fitted a lime plank a bit lower (5 walnut planks at mid ships). This I allowed to fall where it wanted to around the curves of the hull. I will fit the walnut planks up to the lime plank, before removing it, shaping the walnut planks to fit. I’m using superglue to fit the walnut planks.DSC_1172

DSC_1177

DSC_1184

DSC_1219

DSC_1220


PLANKING PROGRESS

After a long break, I’m progressing again with my model of the Mary Rose. The first layer of planking of the lower hull is complete, and I’m busy sanding down, and correcting imperfections by gluing additional lime where needed, then sanding again. I cut away one section of planking that I wasn’t happy with, then replaced it. Once I’m happy with the shape of the lower hull, I will progress to the upper hull. I could have made a neater job of this, but as long as the shape of the hull is good, and the planks are firm on the bulkheads, then that’s all that matters. The second layer of walnut planking will need to be neat. 

It’s just as well that I’m not building this for Henry VIII, he would probably have lost patience with me and had sent me to the tower.

DSC_1169

DSC_1171

SECOND RUN OF FIRST LAYER OF PLANKING

Seven gun ports will be sited in the first run of planking on each side of the model. It’s easier to mark their exact position now than it will be when all the first layer of planking is complete as there are more visible bulkheads to take measurements from. So I’ve done this now, before continuing with the second run of planks, then drilled a 4mm hole to mark the centre of each gun port.

I’ve fitted a plank either side, five plank widths down from the first run, measured from the centre of the hull. As before, I’ve found that the curves of the planks don’t look right in areas near the bow and stern (marked with blue arrows at the bow). It is the same on both sides. I’m using the same method to correct this as I did with the first planks of the first run, by gluing another thickness of lime planking over the top, locally, then sanding down until I get the curve I want. It’s easier to see the curve of the planks when they don’t have planks fitted either side, so I’ll continue this method from now on, so when the first layer of planking is complete I will know that every fifth or sixth plank has the curve to work to. Then I will add wood where needed between them to sand to shape. That’s the plan at the moment, but I am making it up as I go along.

dsc_5215

dsc_5206

dsc_5207

dsc_5208

MARY ROSE PLANKING UNDERWAY

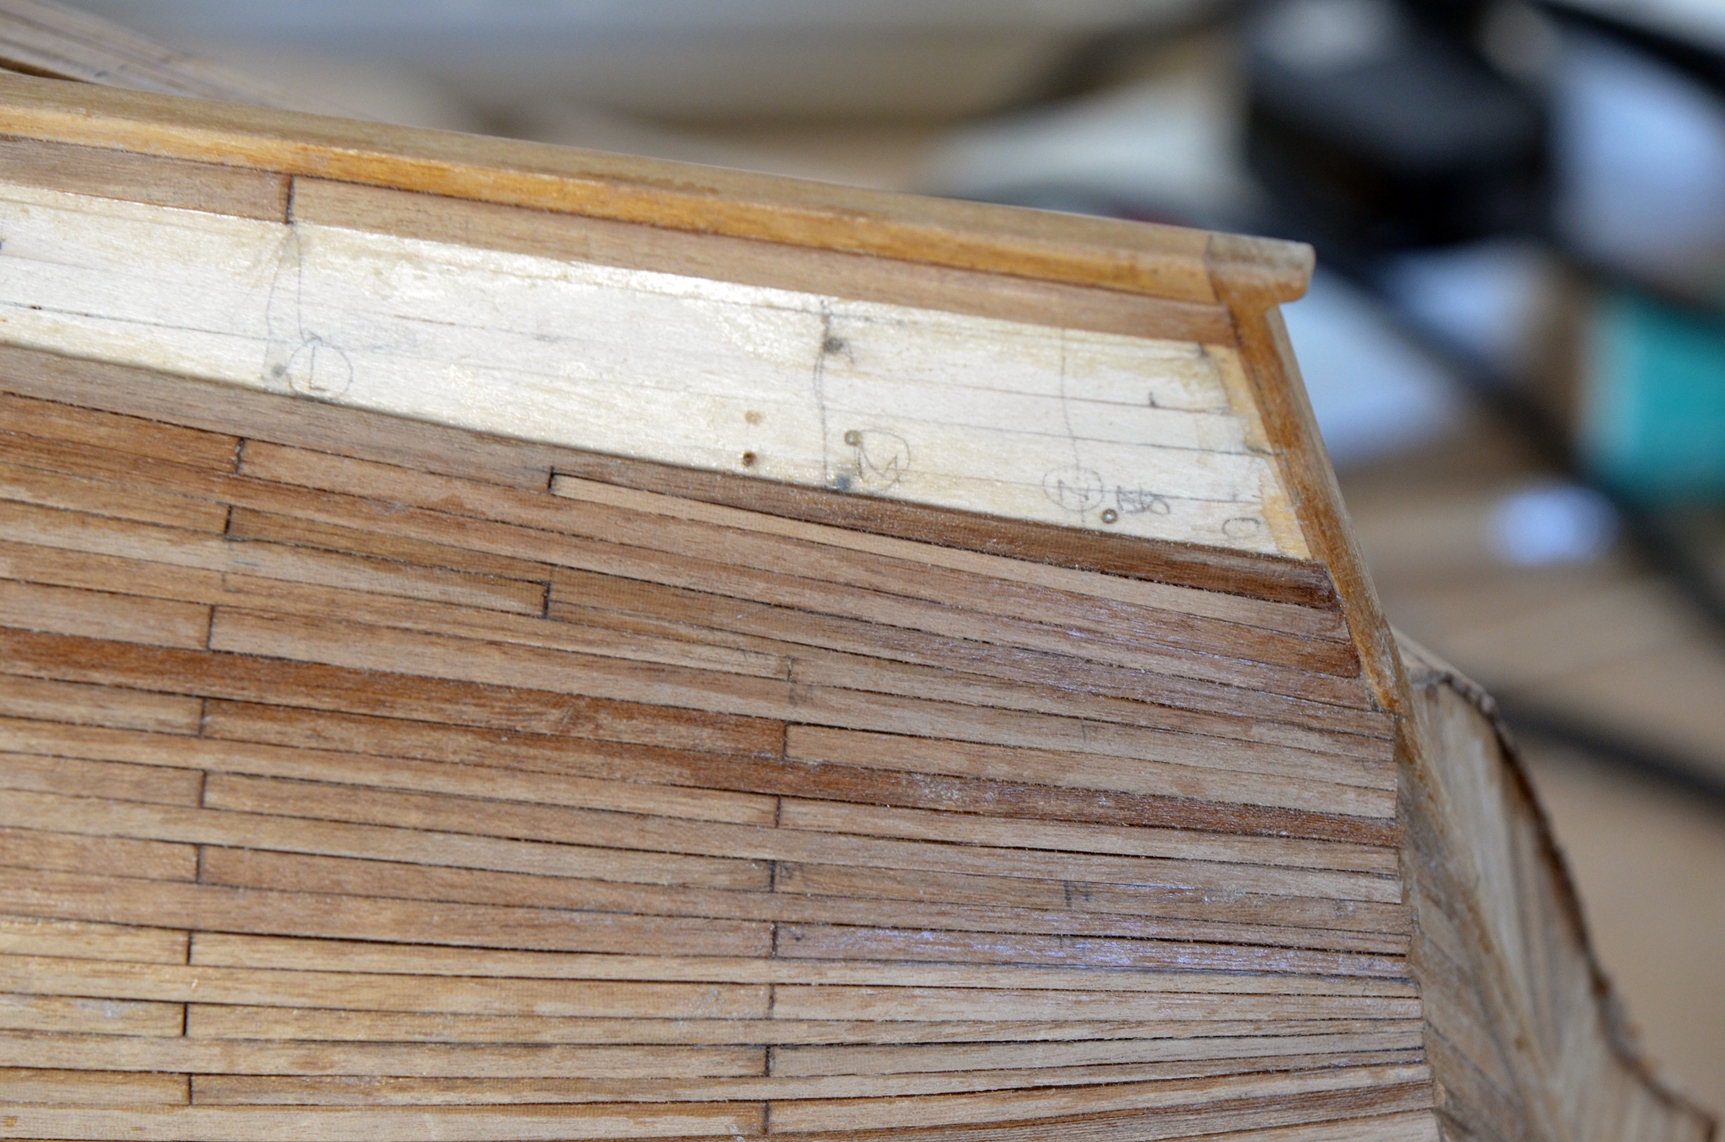
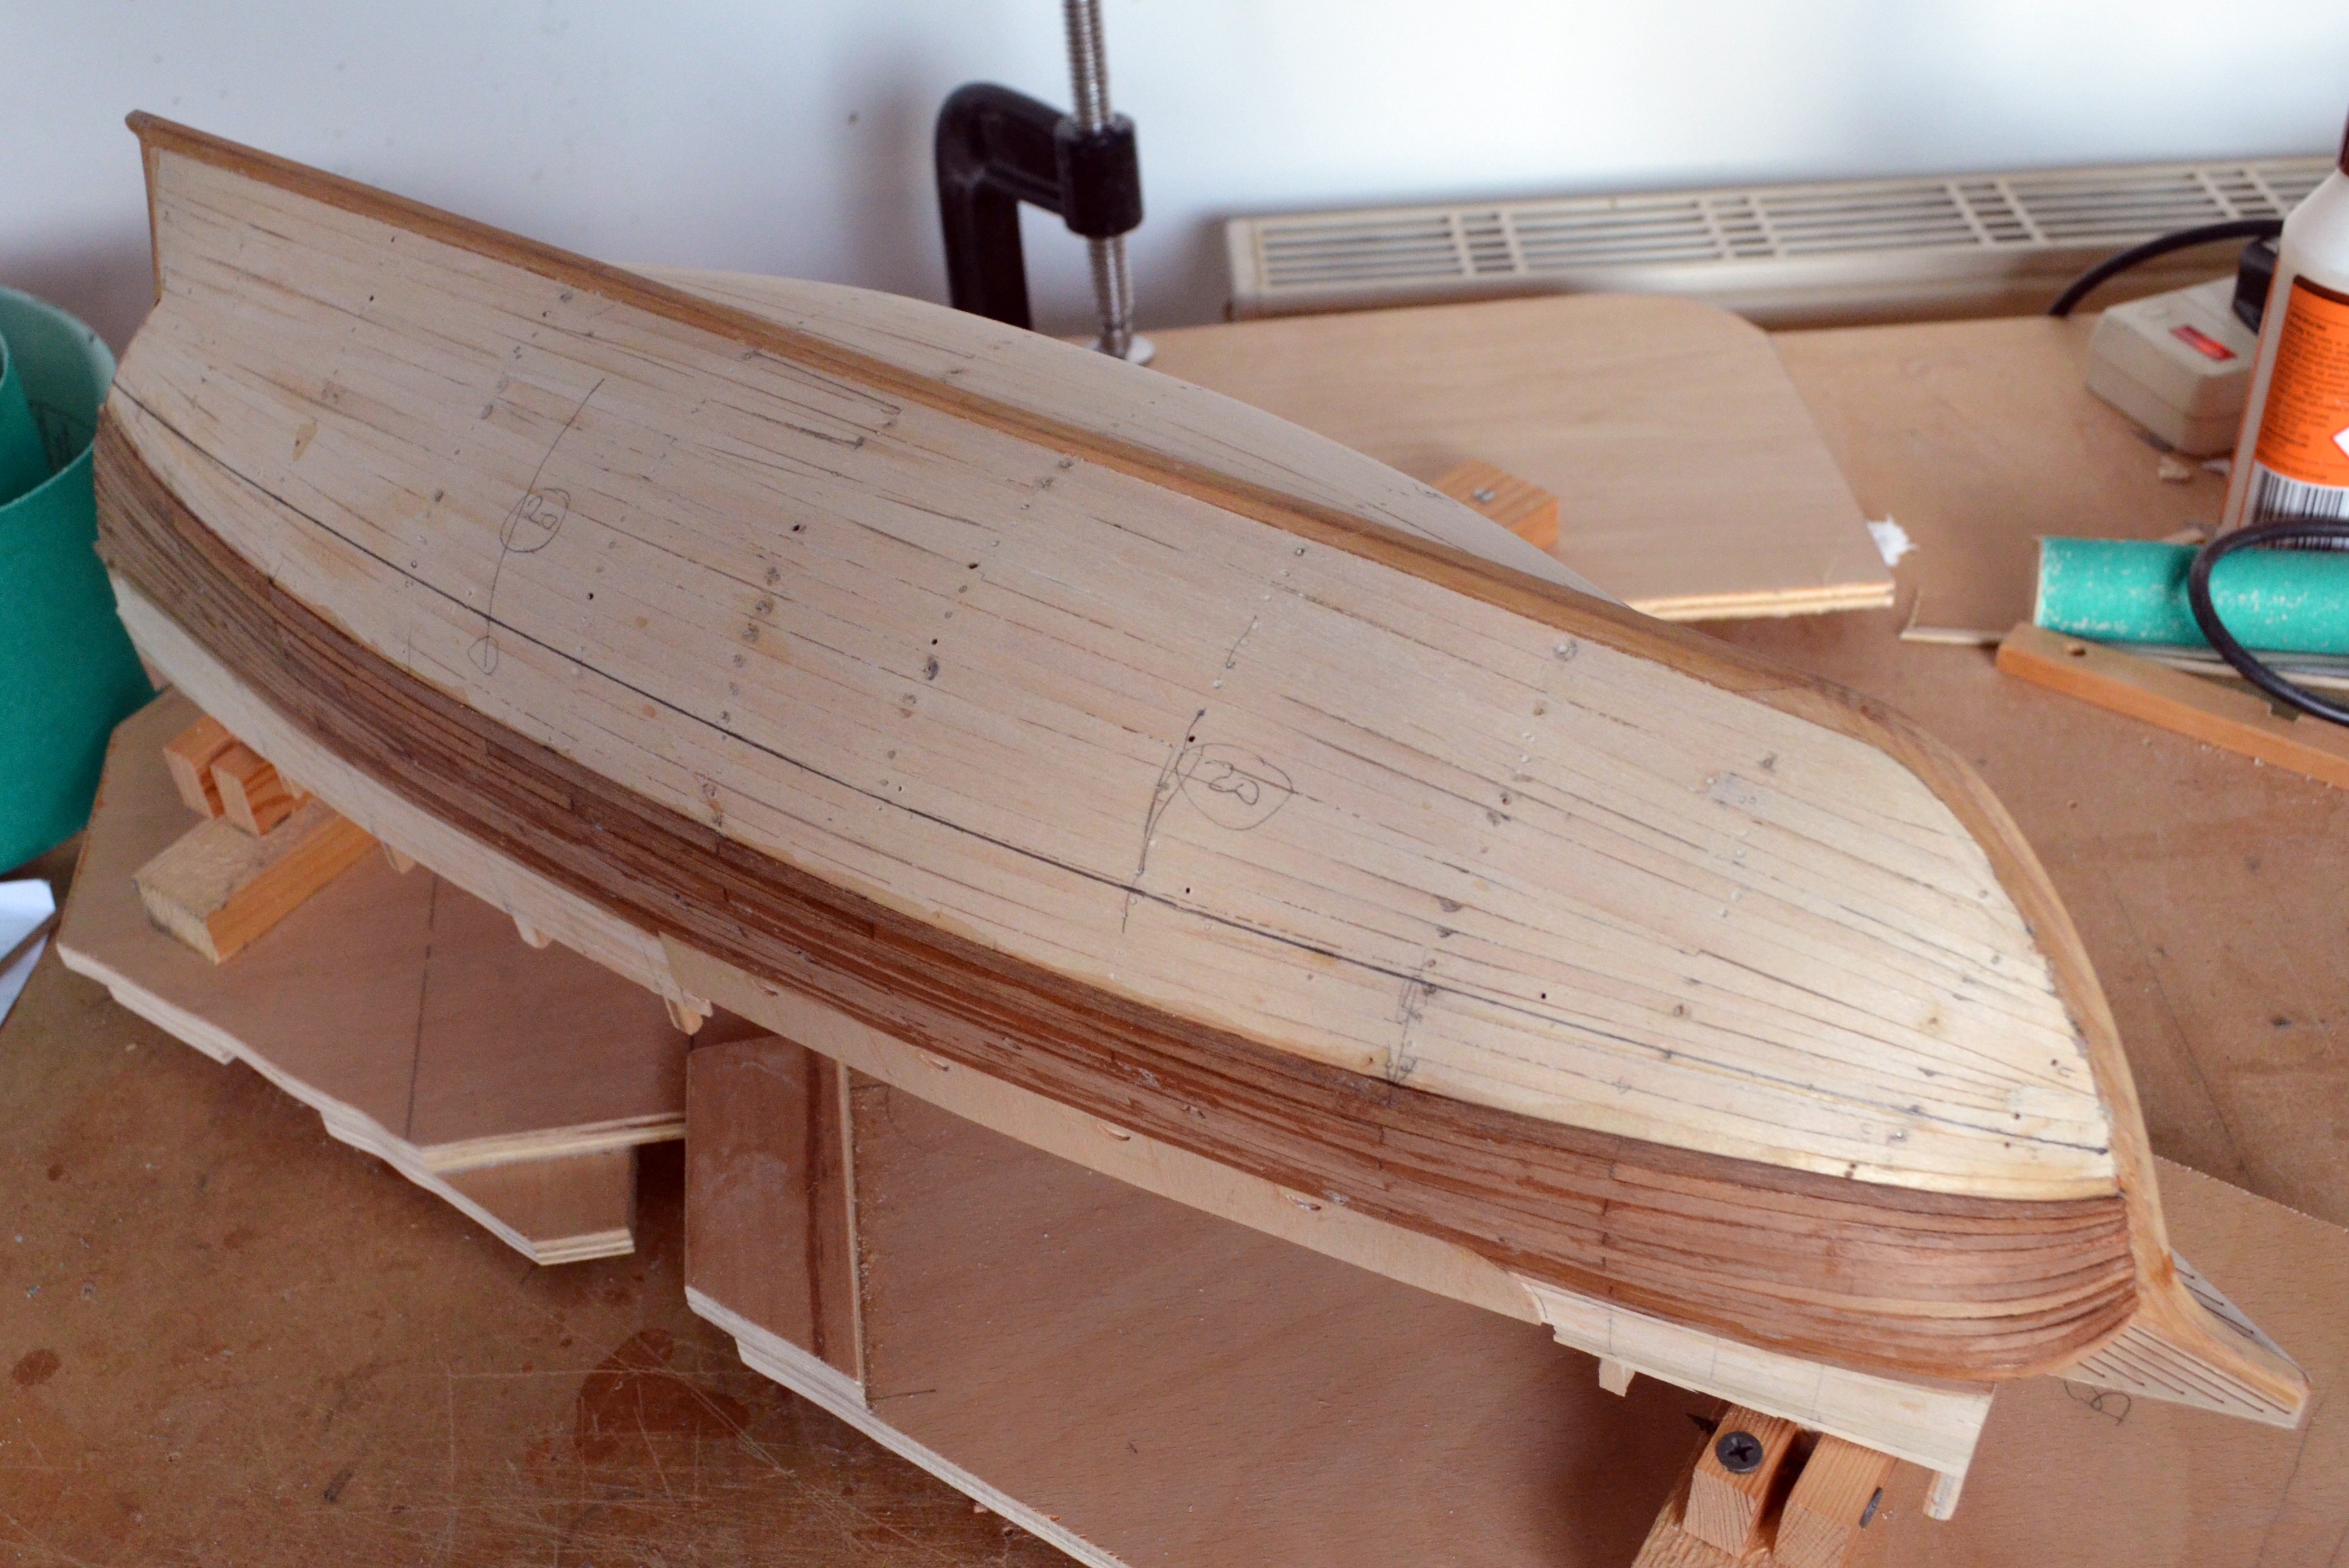
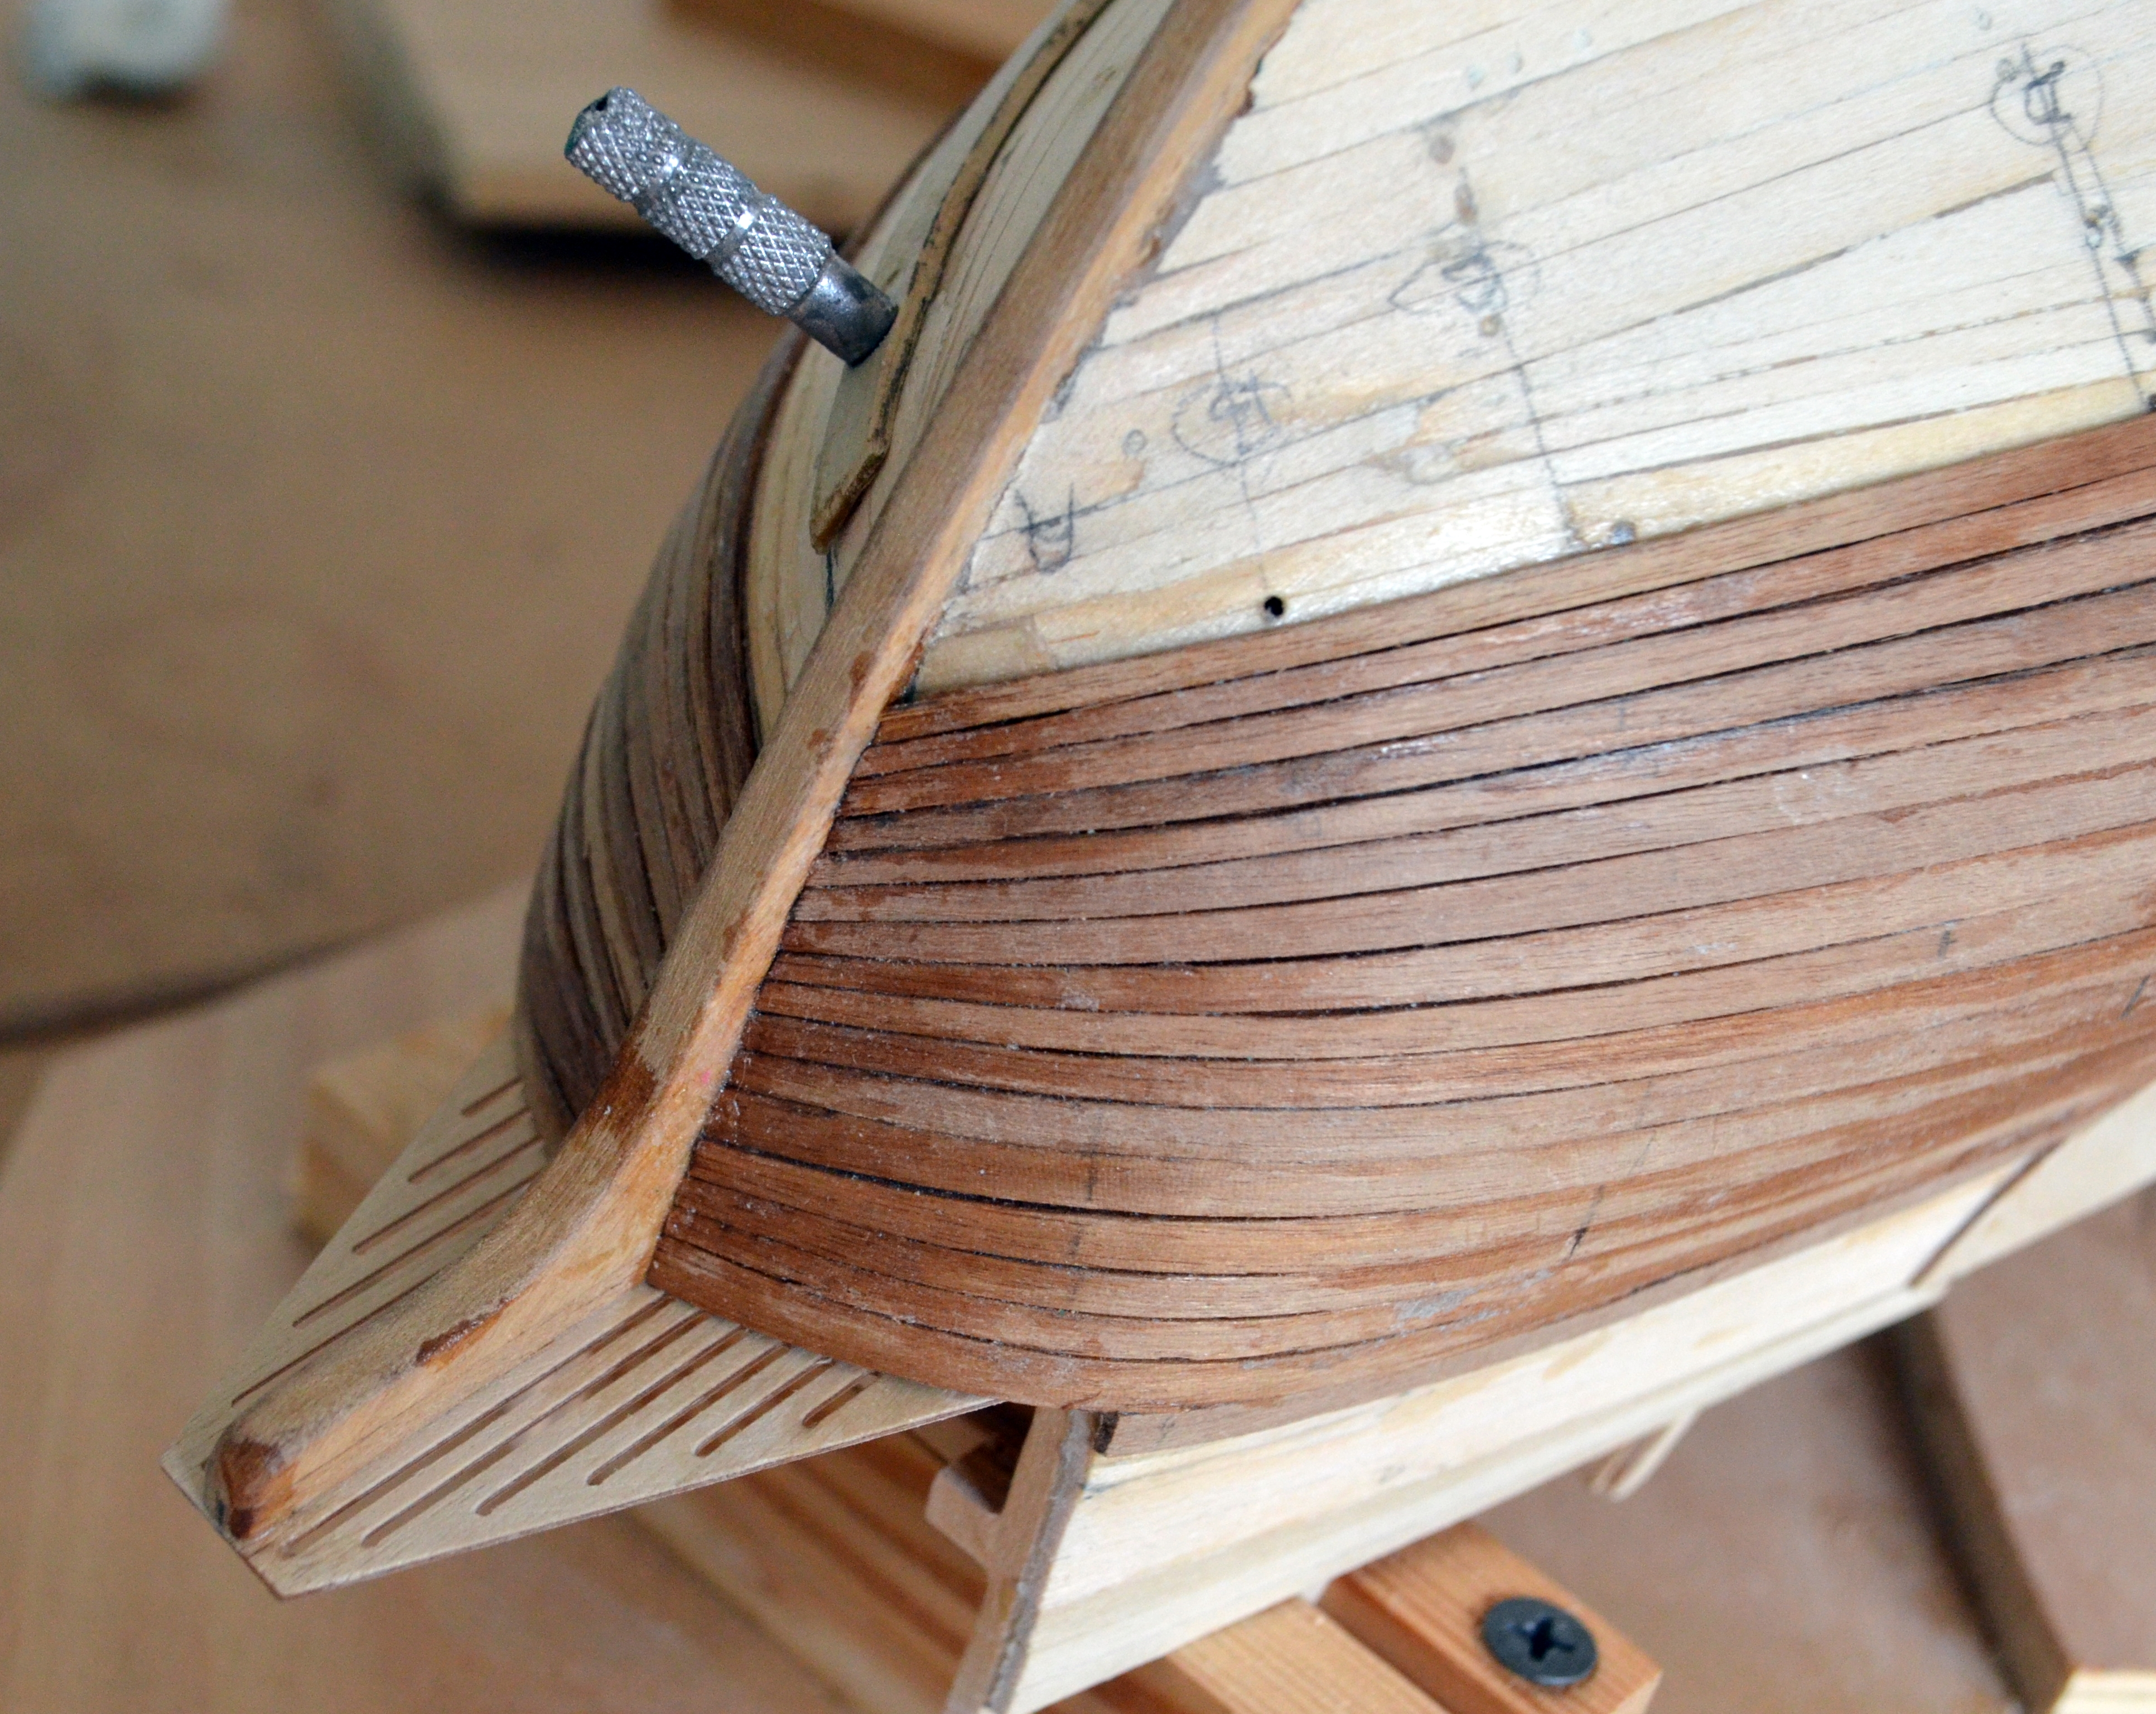
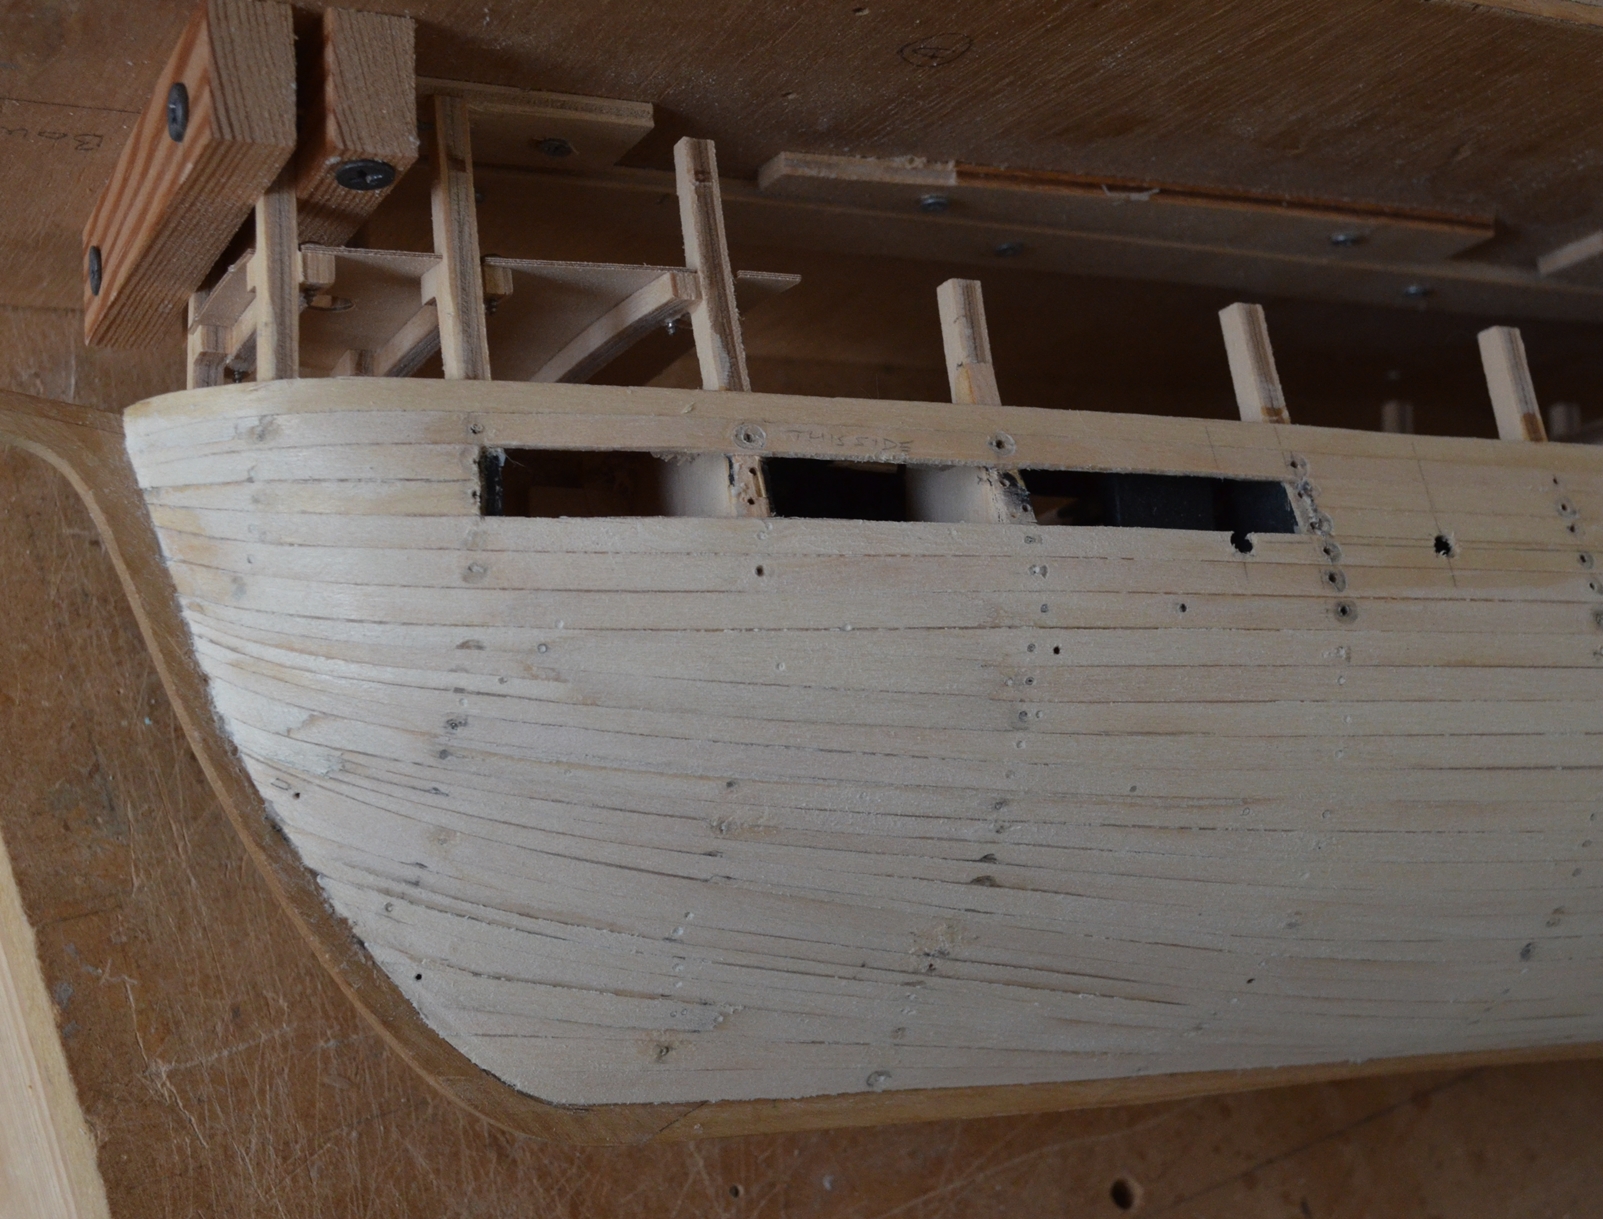
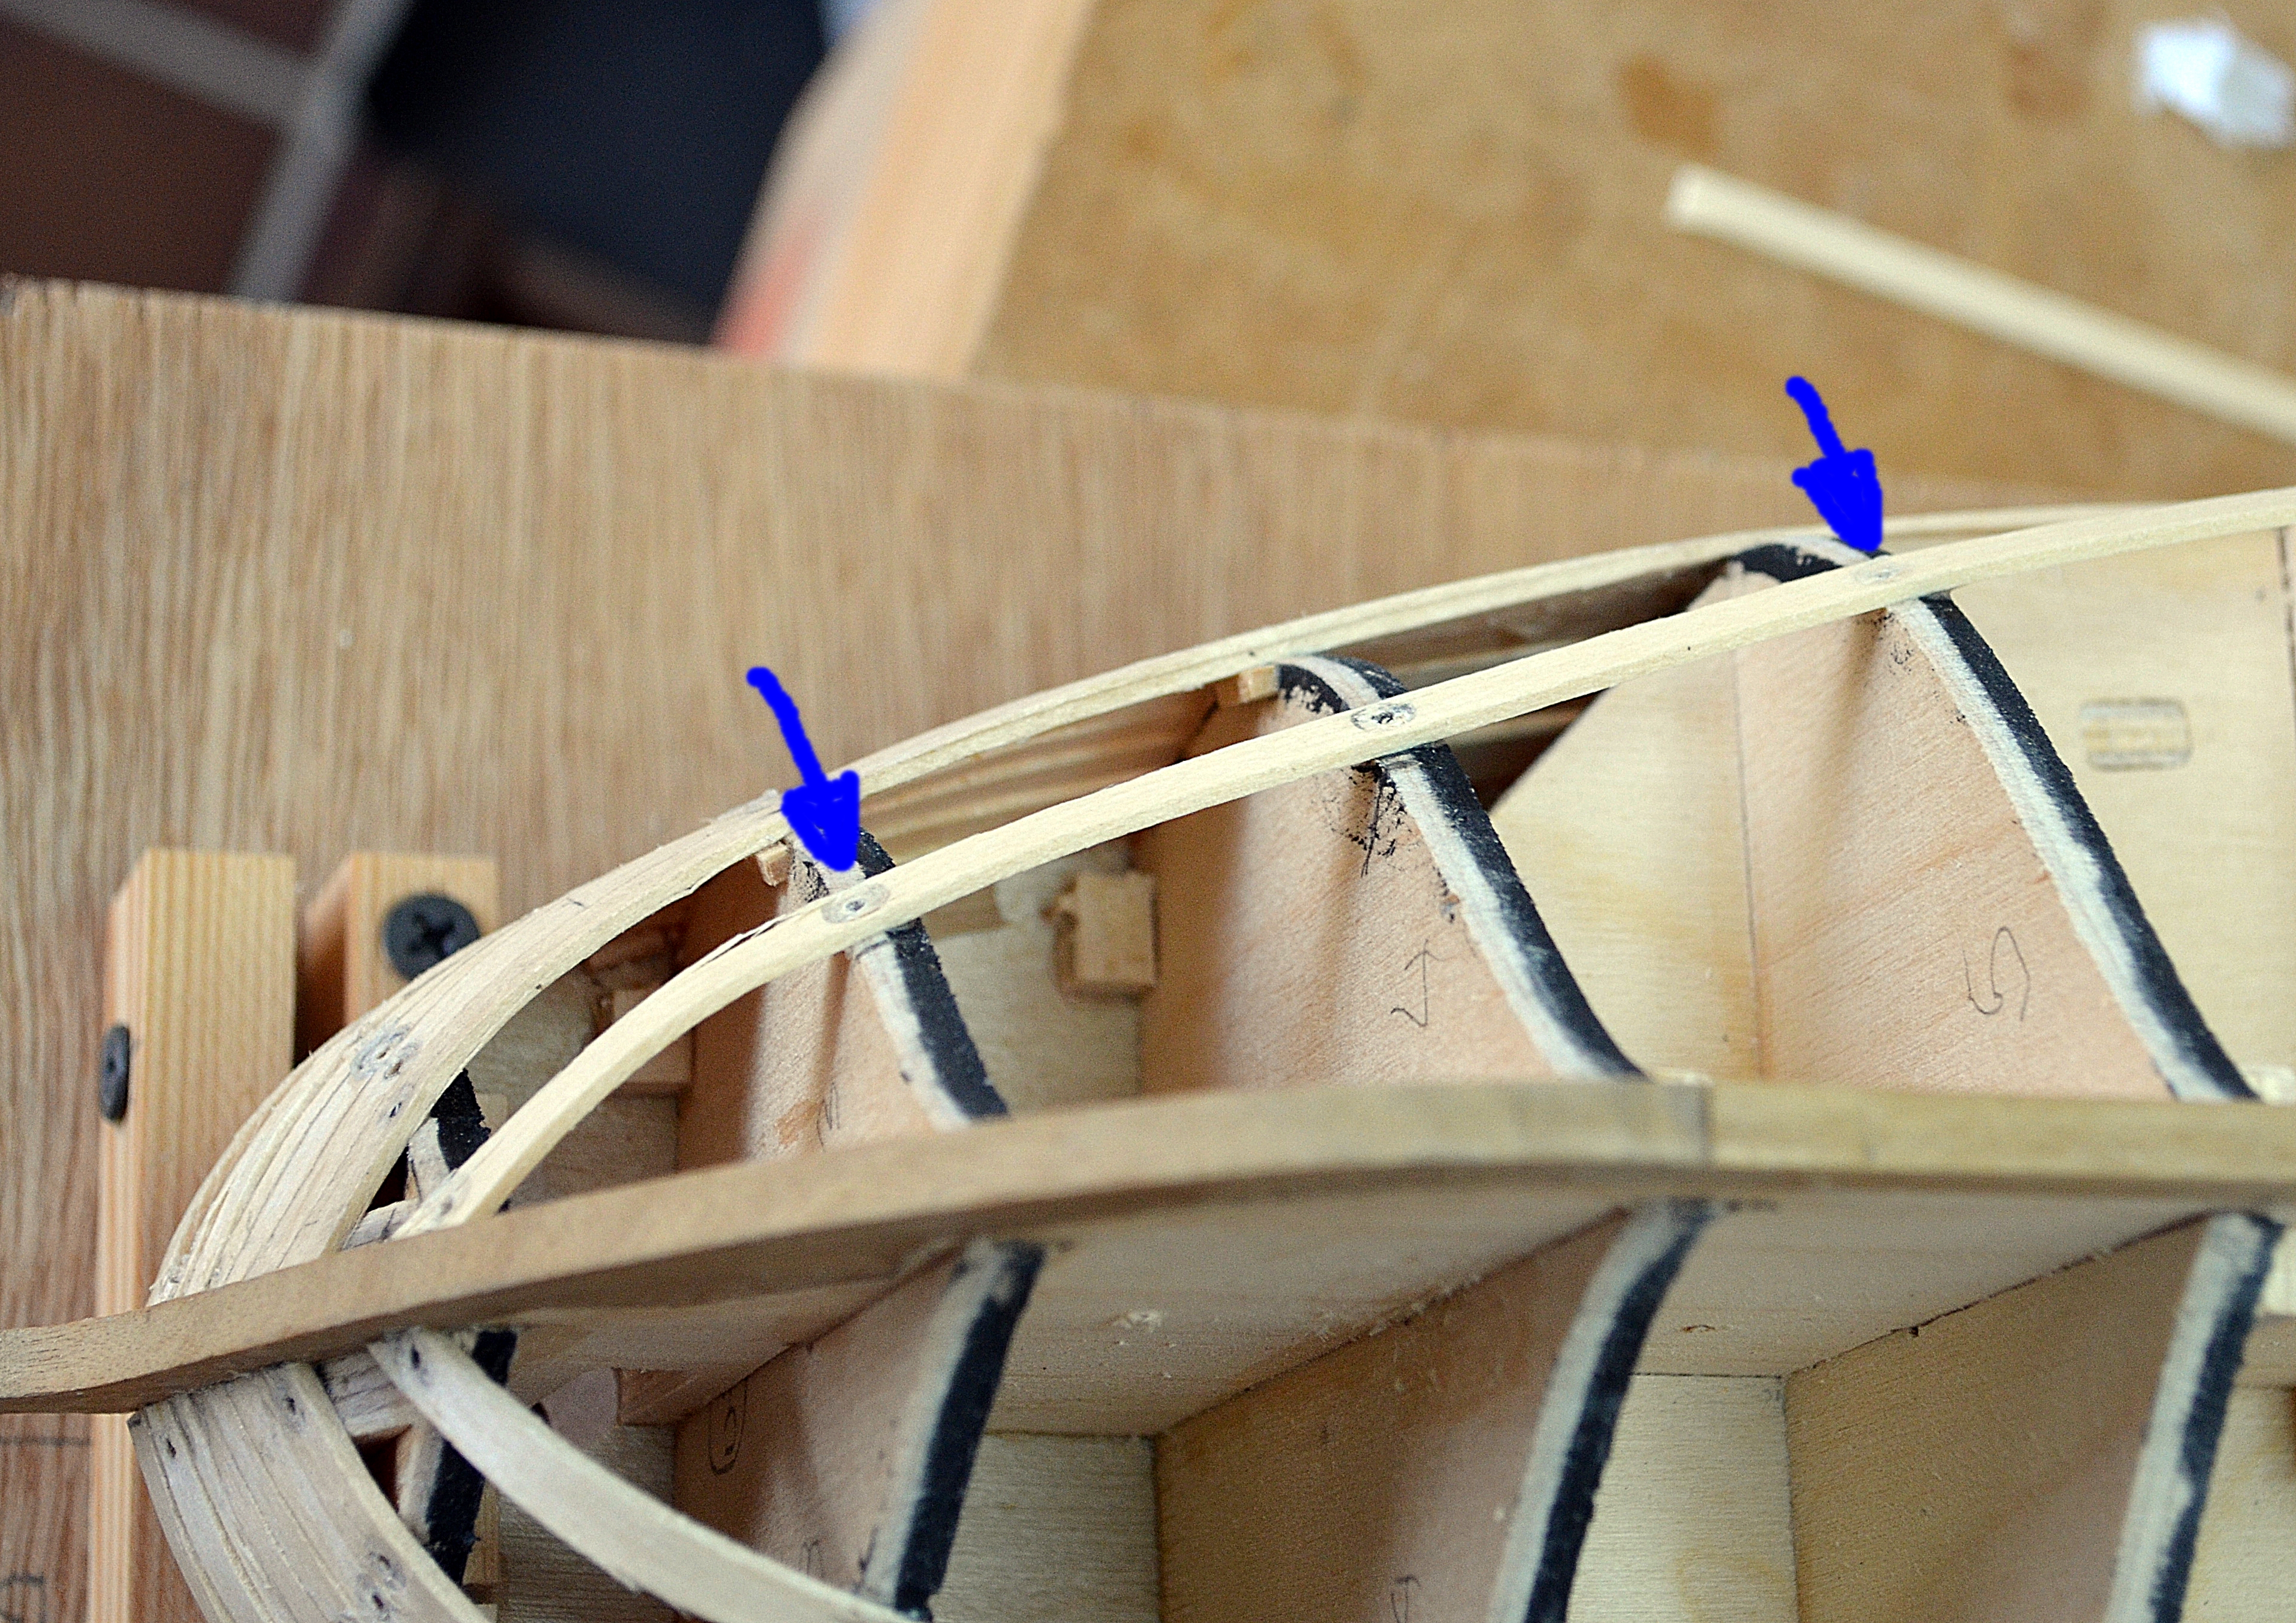
The first run of planks in lime have been completed on each side. There will be some filling and sanding needed to get all the curves of the hull running smoothly, but I’ll probably leave that until I’ve completed all the first layer. Mostly there have been no problems, and my plank bending skills have improved. I did have a small problem when fitting one of the final planks, between two that had already been fitted, in that the glued joint of the plank to the bulkhead de-laminated. I hope I’ve cured this by drilling tooth-pick sized holes in the offending plank, into the bulkhead, and those either side, then reinforcing the joint with glued toothpicks (see photo). After sanding down, it seems to have worked.

I’ve found a useful hull planking instruction manual, written by J. Hatch (Captain Pugwash) on the internet:

Click to access plankingprojectbeginners.pdf

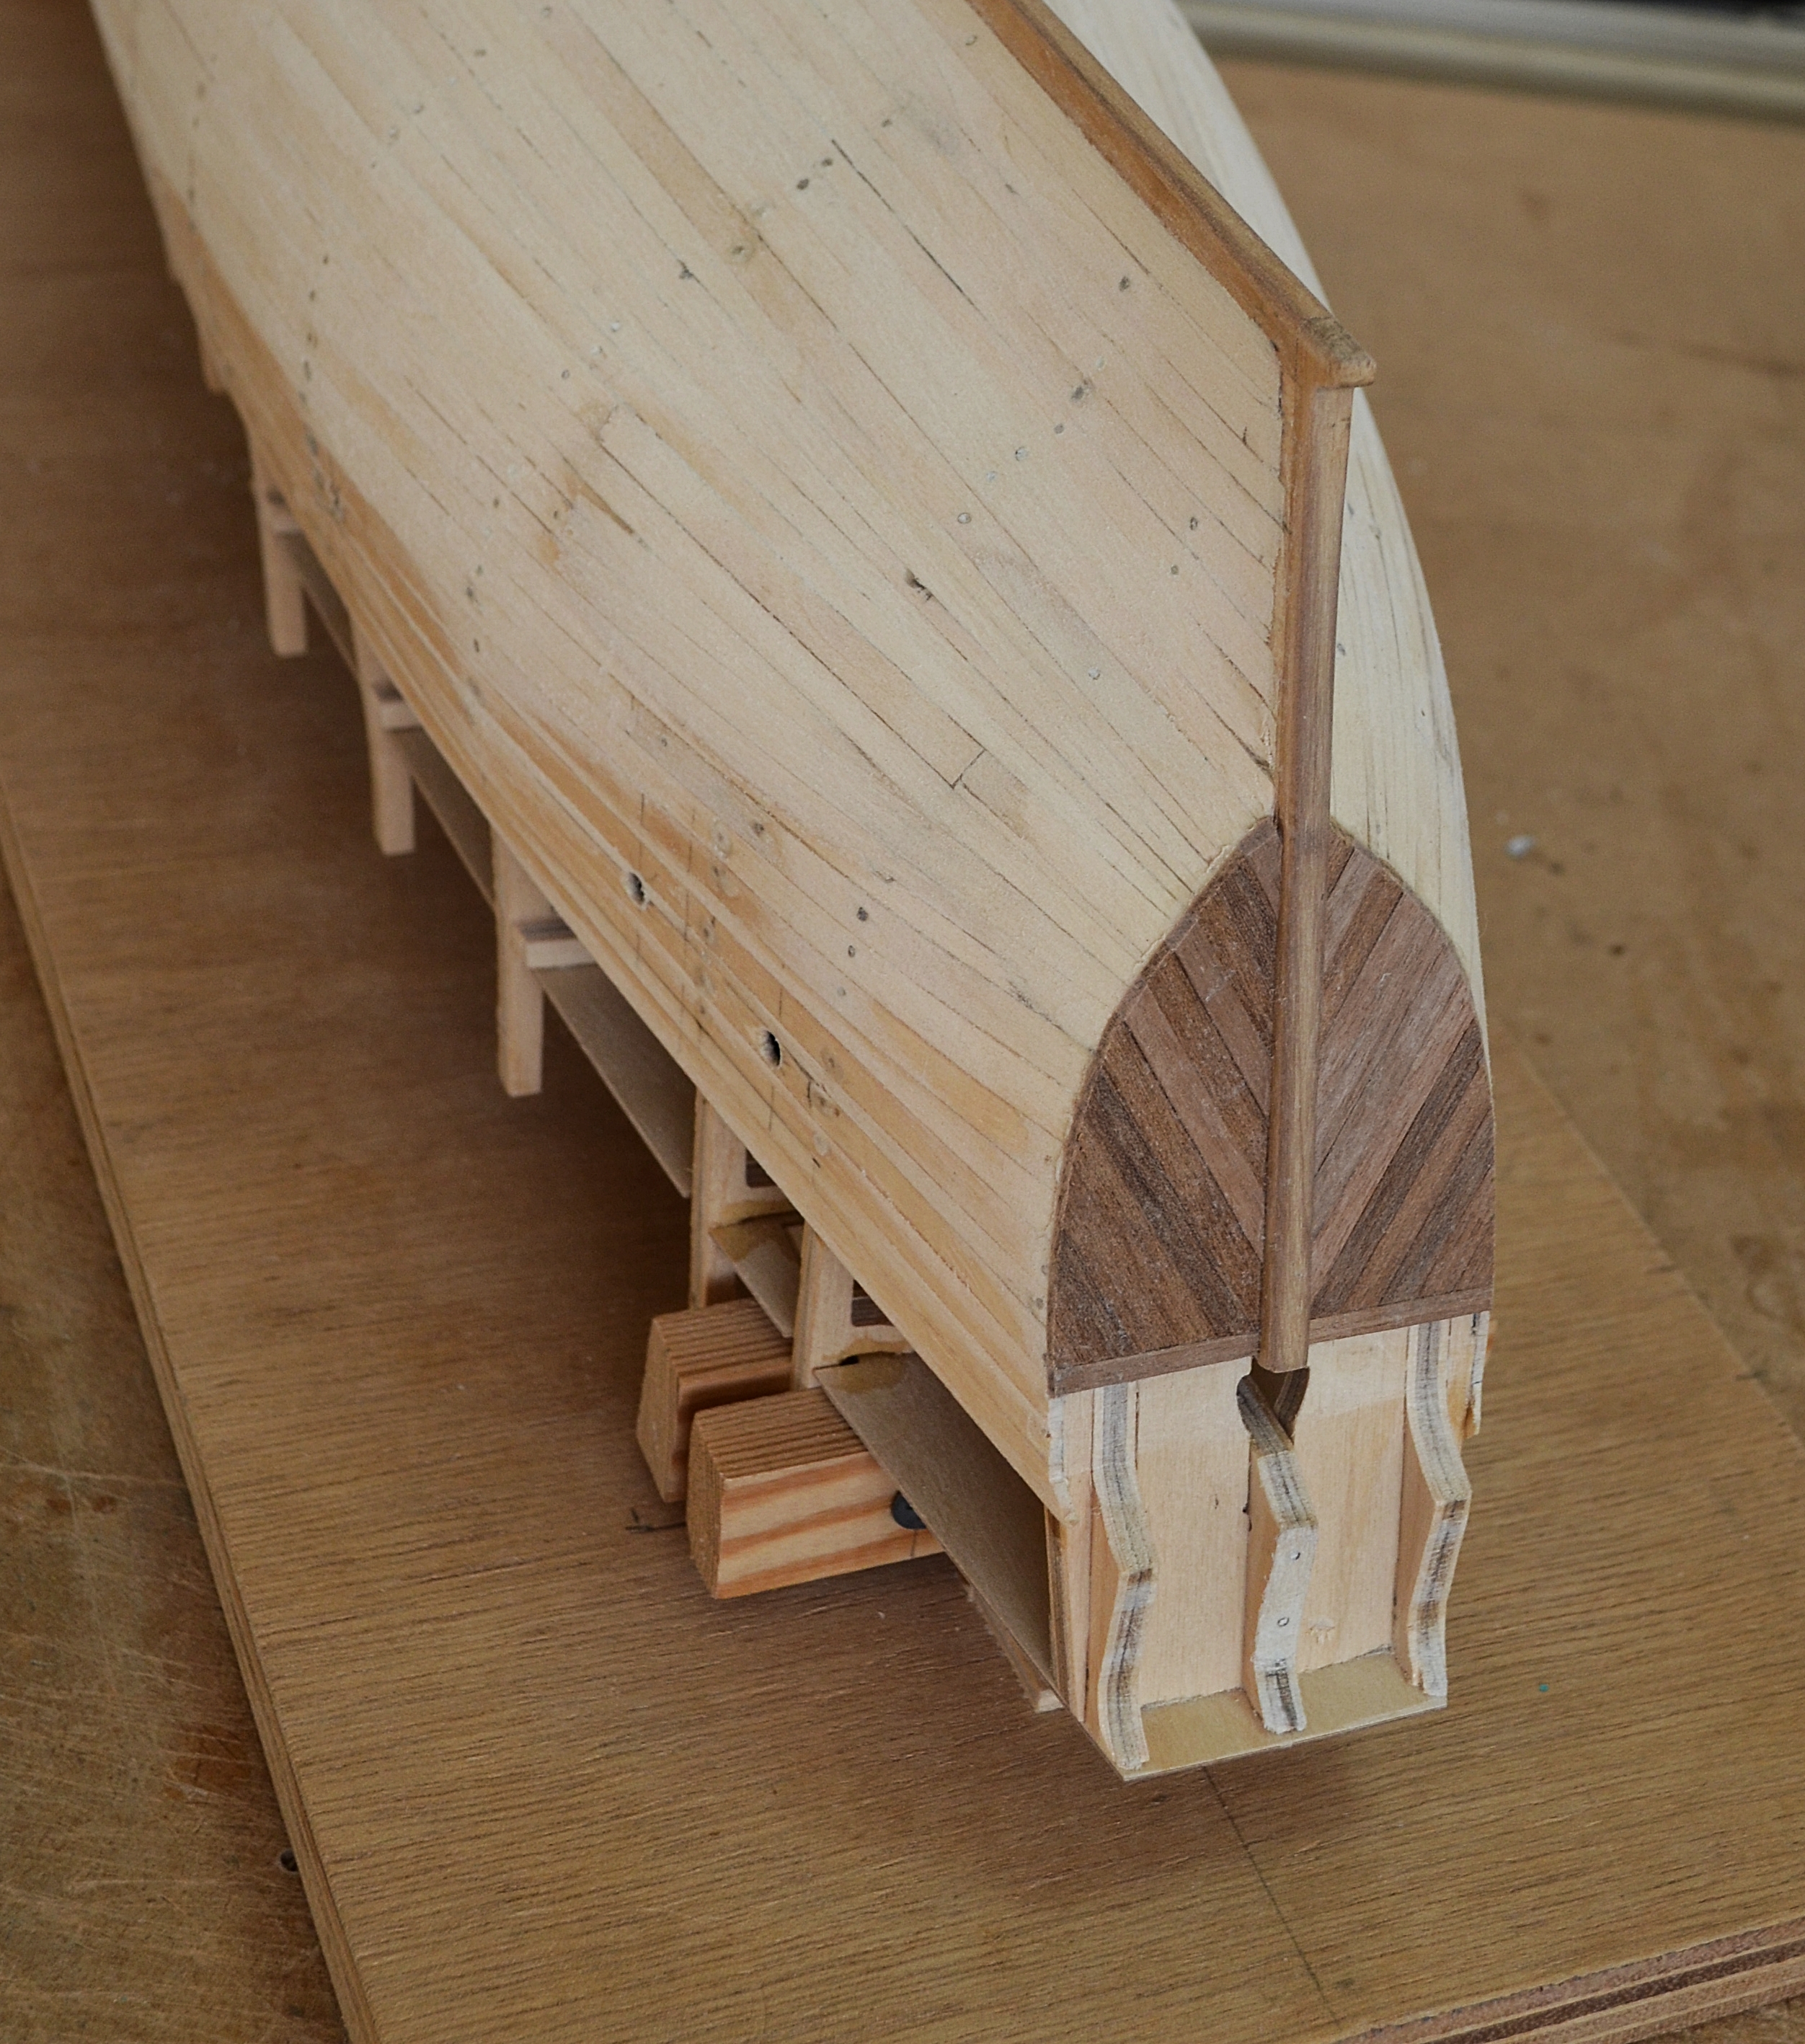
I wish I’d read this before starting the kit, and I would recommend it to any beginner before diving in to an ambitious model boat project that involves planking a hull. There is some detail on how to cut ‘RABBET LINES’. These are grooves in the keel that accept the plank ends for a neater finish. In the case of this kit, it might have been better to cut some of these before gluing the keel together. Too late now, but I’m still confident I can achieve a good result.

My next planking will be five of six plank widths lower down. Once again, I will glue one plank in place, letting it run the way it naturally wants to run to the bow and stern, then I will complete planking in between. As before, I will replicate each plank on one side, with the same on the other side.

dsc_5191

dsc_5100

dsc_5099